Showing posts with label Baking. Show all posts

Monday, October 25, 2021

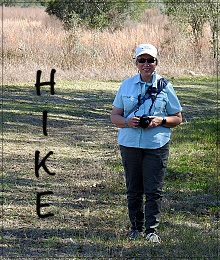
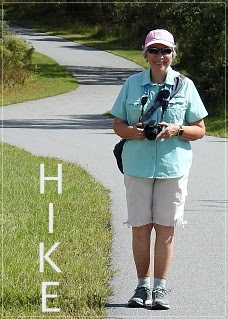
Are you ready for a Hike?

 
I hope you're not tired of seeing the Swamp Sunflowers! 


We found some in the most unexpected place! 


Halpata Tastanaki Preserve from the hwy 200 trailhead is DRY! The trail is soft white sand in places!


But we saw more of the sunflowers there than the wetter areas at the Pruitt Trailhead.


They've put up a new sign, which looks nice and we will walk to the right of this photo along the sandy trail to begin and make a loop.

OK! Now let's switch gears! We still order our groceries online and pick them up at Walmart! Easy peasy!


And this week, our shopper gave us a bag filled with freebies. What a nice surprise! Thanks Walmart!

We usually just stick with grocery items but this week, I put a Wilton Bundt pan in the order. And for less than $9 I have a new bundt pan for my favorite cake recipe!


Thanks to my blog friends at The Low Carb Diabetic here, I have a cake that I can eat! YAY! I am allergic to sugar and usually just do without dessert but now I have this apple cake to enjoy! Here's the link to the original recipe HERE.


I cut it into serving sizes and freeze them in a ziplock bag. That way I can take out just one serving, thaw it and even put a few drops of water on top and microwave it for 15 seconds to eat it hot! 

Here's the recipe!

Apple Cake

8 servings
1 1/4 cup (140 g) blanched almond flour
1/4 cup (24 g) coconut flour
1/2 tsp. baking soda
1/2 tsp. xanthan gum
1/2 tsp. sea or kosher salt
1 tsp. baking powder
2 tsp. ground cinnamon
3 apples, peeled, cored and sliced thin
1/4 cup (56g) butter or ghee, room temp.
1/2 cup xylitol or Swerve powdered
1/4 cup juice from lemon (about 1 and 1/2 lemons)
4 eggs, room temp
1 tsp. vanilla extract

Directions
1. Preheat oven to 350 degrees F. Grease a 9-inch Bundt pan with oil (well)
2. In a small bowl, add almond flour, coconut flour, baking soda, xanthan gum, baking powder, salt, and cinnamon. Put aside.
3. In a standing mixer with the paddle attachment, add the room temperature butter and sweetener (xylitol or Swerve). Beat on high for 3 minutes until it is light and fluffy.
4. Turn the mixer to medium high and add 1 egg at a time, making sure it’s incorporated into the batter before adding the next. When all eggs are added, add the vanilla.
5. Add half of the lemon juice. Add the dry mixture to the bowl, mix and then add the remaining lemon juice.
6. Fold in the apples with a spatula. Batter should be light and airy. Add to the Bundt pan and spread to even out the top.
7. Bake for 35 minutes until edges are slightly brown and toothpick comes out clean.
8. Place on a cooling rack for 10 minutes. After 10 minutes, take the cake out of the pan by placing the cooling rack over the pan and flipping it over.

And take my word for it....it is AMAZING!
 
I've tried a few brands of almond flour and I've had good results with all of them. The one I used for this recipe had some coconut flour mixed in so that worked good!


Have you had a good week too?

I'm joining Angie for Mosaic Monday HERE . 

Also I like Thursdays HERE.   

Monday, November 30, 2020

What have I missed? Mosaics?

 
I took a week off from blogging. I would like to say that I stayed off my computer for a week but my hubby would say I did NOT go 'cold turkey' no pun intended! I did limit my time online but it didn't seem to help my headaches. And I missed everyone SO much! I look forward to doing some visitin' but I will still have to be prudent. So let me know what I've missed on your blog in your comment. 


We did a LOT of hiking this past week and that always makes me feel better. 


The grasses in the fields look so beautiful. 


We spent one afternoon hiking the Ross Prairie State Forest loop.


I received a fun gift box from my friend Kathy from Looking at Life through my Bifocals HERE. I won her blog giveaway and she filled a box with nice things for me to enjoy! Thank you Kathy!


And my blog buddy, Tom the Backroads Traveller HERE sent me a wreath again this year. I am getting spoiled having a fresh wreath from NY to enjoy all Christmas season. It hangs on my front door but we keep our big door open most of the time during the day so it puts the fresh evergreen scent into our house all day. Thank you Tom! 


I baked yeast rolls using King Arthur Flour for Thanksgiving dinner. I love their catalog and wish I could afford to order things from it. But I'll be happy with the flour! It really is the best.


Have you had a good week? I know it's been difficult for many so let's continue to keep each other in our prayers. My friend Barbara from Sweet Tea and Sandals lost her precious Beloved husband a few days ago. Please keep her in your prayers. And let me know if you have someone that needs my prayers. Let's encourage and hold each other up in these hard times. God bless you. 

I'm joining Angie for Mosaic Monday HERE . 

I'm linking with All Seasons at the Jesh Studio,


AND my Monday post HERE.

Monday, February 5, 2018

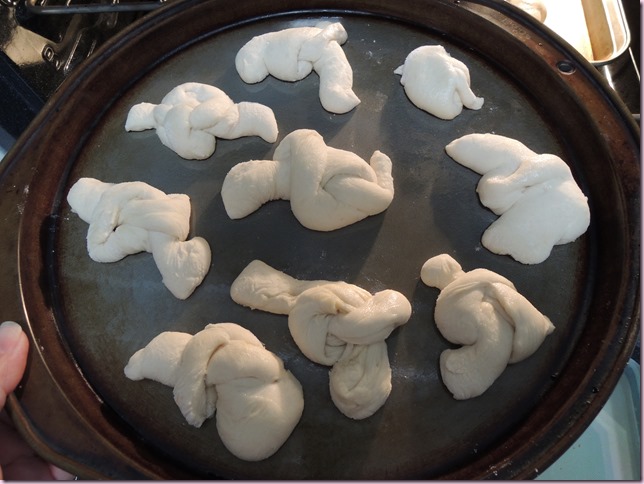
Garlic Knots…OH MY!!!

I wanted to make some yeast bread but something a little different! So I did a google search and found

 Garlic Knots from Simply Recipes!

And I have to tell you….

DSCN4653

they are amazing!

Mouth watering delicious!

So here’s the recipe for Garlic Knots

If you are making your own dough:

  • 3/4 cup warm water (105°F-115°F)
  • 1 package (2 teaspoons) of active dry yeast (check the expiration date on the package)
  • 1 3/4 cups bread flour (can use all-purpose but bread flour will give you a crisper crust)
  • 1 Tbsp olive oil
  • 1 teaspoon salt
  • 1 teaspoon sugar

If you are using store-bought pizza dough:

  • 14-ounces pizza dough

Garlic-Butter Coating:

  • 5 Tbsp unsalted butter
  • 4 cloves garlic, minced
  • 1/4 cup parsley, minced
  • 1 teaspoon salt
Method

If you are making your own dough, follow steps 1-3. If using store-bought pizza dough, let thaw to room temperature and proceed to step 4.

1 Proof the yeast: Sprinkle the yeast on top of the warm water and let it sit for 5 minutes. Stir to combine and let sit for another 5-10 minutes, until it begins to froth a bit.

2 Make the dough: In a large bowl, whisk together the flour, salt and sugar. Make a well in the center of the flour and pour in the olive oil, then the yeast-water mixture.

Mix this together to form a soft dough and knead for 5-10 minutes. (Can use a KitchenAid mixer with a dough hook for this step.)

3 Let the dough rise: Shape the dough into a ball and lightly coat with olive oil. Put it in a large bowl, top the bowl with plastic wrap and set it at room temperature to rise to double its size. This should take anywhere from 90 minutes to several hours.

4 Quarter the dough and flatten into rectangles: When the dough has doubled in size, cut it into fourths.

Set out a large baking sheet and line it with a silpat or parchment paper.

Working with one piece at a time, flatten into a rough rectangle about 5 inches long 1/2 inch thick.

5 Slice into strips and form knots: Using a sharp knife, slice the dough into strips of about 1 inch wide by 5 inches long.

Cut these strips in half.

Take one piece and work it into a snake, then tie it in a knot. The dough will be sticky along the cut edges, so dust these with flour before you tie the knot.

Set each knot down on the baking sheet and repeat with the remaining dough. Remember that the dough will rise, so leave some space between each knot.

6 Brush with olive oil and let sit to rise: Once all the knots are tied, paint them with a little olive oil.

Loosely cover them with plastic wrap and let them rise again until doubled in size, anywhere from 90 minutes to three hours or so. Toward the end of this rising period, preheat the oven to 400°.

7 Bake the knots: Uncover the knots and bake in the oven 12-15 minutes, or until nicely browned on top.

8 Make garlic butter parsley glaze: Meanwhile, melt the butter in a small pot and cook the garlic gently in it just long enough to take off that raw garlic edge, about 1-2 minutes over medium-low heat. Add the salt and parsley and stir to combine. Turn off the heat.

9 Brush cooked knots with garlic parsley butter mixture: When the knots are done, take out of the oven and let cool for 5 minutes. Paint with the garlic-butter-parsley mixture and serve. These are best warm, but are good at room temperature, too.

from Simply Recipes ~ https://www.simplyrecipes.com/recipes/garlic_knots/

and now to mention the couple of things I did different. I did NOT let them rise nearly as long as this recommends. And I just sprayed my pans with PAM!

DSCN4647

Rising for the first time was 30 minutes. And then I heated my oven for only about ONE MINUTE and put my knots in for the second rise, took them out, preheated my oven and then baked them.

DSCN4646

I did not use as much parsley and after I dipped the baked rolls into the melted garlic butter, I rolled them in a mixture of Parmesan and Romano grated cheese.

DSCN4655

We had some leftover grilled chicken (I need my protein)

DSCN4651

(this is hubby’s plate….I didn’t have NEARLY quite that much!)

DSCN4650

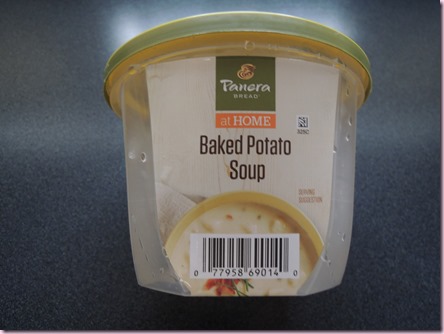
and I heated this wonderful Potato Soup for LUNCH!

DSCN4657

Now what’s for dinner?

DSCN4649

Maybe I should have a salad! haha! Actually we’re having BBQ Brisket for dinner…but I won’t eat a lot…I promise! Did you make anything special for Super Bowl Sunday?

02Feb

I’m joining Mosaic Monday HERE

and Cooking and Crafting with J & J.

Monday, October 2, 2017

"If You Give a Moose a Muffin"

If You Give a Moose a Muffin is a delightful children's book by Laura Numeroff. I fell in love with this little book the moment I saw it. And since it was only a nickle at the old thrift store and a bit 'beat up'....I didn't mind cutting it apart for my next altered book project!


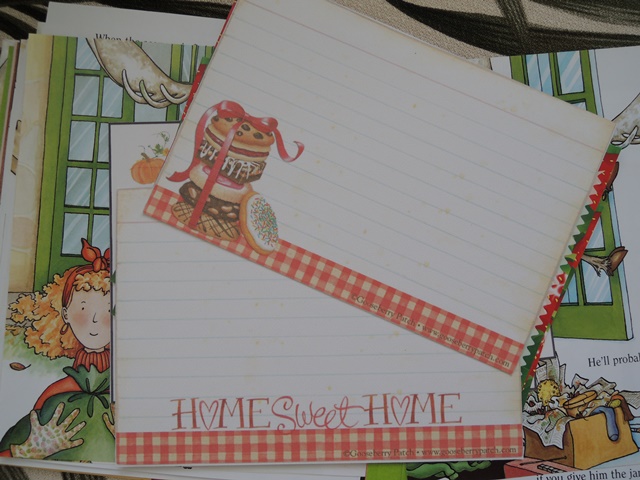
I started working on it yesterday by printing out some recipe cards. 


My favorites were the ones I found at Gooseberry Patch on their 'free goodies' page HERE. (I had trouble accessing them on their site and ended up getting them on Pinterest.)


I have all kinds of ideas for this sweet book and it sure makes me think of Autumn baking!

I promised Maggie my favorite Honey Wheat bread recipe. I made this 'upteen' times when my kids were growing up. I cut it off a bag of whole wheat flour. I remember cutting it off every bag I bought and giving the recipes to the ladies in my church. My kids grew up with whole wheat...whole wheat everything! One time they had a friend over that said we even had whole wheat water! hahaha! Memories!


My sweet hubby bought mums last week to put into the big pots by the front door. Hurricane Irma beat our pot plants to death so it was nice to get some pretty mums to replace them.


Have you done anything special for Fall yet?

It's October...time to decorate!

I’m joining Mosaic Monday HERE 
and Cooking and Crafting with J & J HERE!


Thursday, January 12, 2017

Chicken Pot Pie and Pinwheels!

It’s actually been cold enough lately to use the oven here in Florida!

DSCN0799

So I made a Chicken Pot Pie! One of my favorite dishes (that I NEVER make! lol).

DSCN0784

I had cooked a roast chicken in the oven a few days before, with potatoes, carrots, celery and onion. (I’ll give you that recipe another time) So I had good ingredients to put in the pie.

DSCN0787

I made a white sauce, butter, flour a little salt and pepper and milk and added the chicken and chopped up veggies. I wanted even more veggies, so I cooked a few mixed vegetables in a bowl in the microwave for a couple of minutes and added them too.

DSCN0788

I made a pie crust recipe and used 3 cups of flour to have enough for hubby to make pinwheels. I divided my dough in thirds. I’ve made a lot of pie crusts over the years and my secret for flaky crust is…don’t overwork your dough. Add just enough cold water to the flour and shortening mixture and don’t keep ‘beating’ it!

DSCN0789

(put a ‘little’ butter on top)

Put bottom crust in large pie plate, warm veggies and chicken then cover with top crust. Cut slits in the top for steam to escape. And I put a piece of foil under the pie plate just in case.

DSCN0790

Serve hot!

DSCN0806

I froze some of mine for another cold day.

Roll out the other dough…

DSCN0791

so that hubby can make pinwheels with lots of butter, cinnamon and sugar!

DSCN0793

(notice that sugar canister is just a BLUR!)

DSCN0797

He baked them at 375 for 20 minutes in the toaster oven.

DSCN0801

He didn’t need to freeze any of his! haha!

We cooked together and had fun so…

I’m joining Thankful Thursdays today!

Friday, January 16, 2015

My ‘tried and true’ biscuit recipe!

I wanted to share some favorite recipes this year. I haven’t decided on a word this year. Maybe ‘share’ would be a good one.

DSCN6004

You may already make the best biscuits in the world. If you are BJ-Sweet Nothings, I know you DO!!! Her cheddar biscuit recipe is HERE ! And she takes better photos, too!

But this is the way I make them. And if you don’t have buttermilk on hand, wait until you can go to the store and buy some. It makes ALL the difference!

Buttermilk Biscuits

2 cups flour

2 teaspoons baking powder

1 teaspoon baking soda

1/2 teaspoon salt

1/3 cup Crisco

1 cup buttermilk (may need a little more)

2 tablespoons melted butter

Mix dry ingredients together and cut in shortening. Add enough buttermilk to have a wet dough. Roll out on floured surface but don’t ‘overwork’ your dough. Cut out, dab tops with melted butter. Bake at 425 for 12 minutes and then turn on the broiler for about a minute to brown the tops.

Oh, and do you use a tea cup to measure?

DSCN6620 

This cup is exactly one level cup to the top.

Enjoy your day and if it’s cold, bake something yummy in the oven!

Thursday, October 11, 2012

“The Traveling Susan Apron”

It’s such an honor to be part of this sisterhood. Please see my post HERE for more of the details.

And what a privilege to have this special apron to enjoy!

The apron has done some extra ‘traveling’…

DSCN4962

and look where it showed up!

Well, the apron AND the Snickerdoodle cookies!

PMDSCN4961

It was such fun to share the cookies with more of my family in Myrtle beach!

And yes, my hubby and sweet daughter in law both got bags of cookies, too they just didn’t get into the photos!

I have one more photo to take of my apron.

Anyone want to guess where it is now?

It’s definitely baking weather here!

Have you baked anything special this week?

Saturday, September 29, 2012

The Sisterhood of the Traveling Susan Apron

Do you know what it is?

Have you seen the Traveling Susan Apron?

IMG_3755

(borrowed from Susan’s blog) 

It started back in March 2012.  A wonderful lady named Susan who blogs at My Mother's Apron Strings creates an apron each month and gives it away!  The winner of the March apron was Meggie. She decided to keep the apron for a couple of weeks, write some of her experiences in a journal and then send the apron and journal on to a blogging friend. So far is has been to these sweet ladies in places around the world…

Meggie at Meggie On The Prarie in Texas

Elaine at Pear Tree Log in England

Scarlet at Tales From Beyond The Nook in England

Jane at The Maple Syrup Mob in Ontario, Canada

Deb at Just Cats in Ontario, Canada

Susan at Just Sayin' in Ontario, Canada

and Linda at A La Carte in Georgia.

I feel so honored to be chosen to join this Sisterhood and use this special apron. I plan to take good care of it…and pack it in my suitcase to go along with me on my journeys!

Yes…the Traveling Apron is getting ready to travel by car!

So I got busy baking magic cookies for the trip!

DSCN4824

These are made using my mother in law’s recipe and they are the BEST!

DSCN4842

Oh…the ones on this plate are all round?

DSCN4850

Wasn’t there another plate with odd shapes?

DSCN4851

HERE they are!

DSCN4853

Thanks Linda for this wonderful honor and for all of the sweet gifts you sent along!

DSCN4846 

The apron is happy here in Florida with the palm trees!

PMCropDSCN4850

I’ll check in again soon with updates!

Happy Weekend!