I like Thursdays HERE too!
Thursday, April 2, 2020
Good Morning!
I like Thursdays HERE too!
Monday, July 30, 2018
Pizza on the Grill!
Too hot to cook in the oven? Let’s GRILL our pizza!
I’ve always made pizzas ‘homemade’. My boys can tell you horror funny stories of the heavy whole wheat pizzas I made when they were growing up. (loaded with lots of healthy toppings) But they loved them and I always had to make more than one!
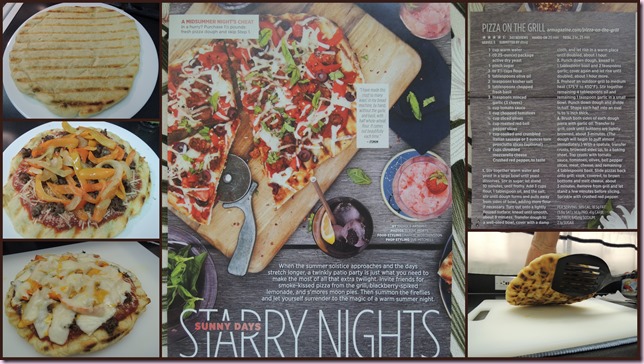
OK! So now fast forward a ‘few’ years! I still make homemade pizzas with my own ‘made up’ recipe. But I have always wanted to try to grill one. I found a recipe in All Recipes magazine but of course I changed it up a bit.
The online recipe is HERE.
I’ll write out a little condensed version of how I made mine.
Crust ingredients…
1 cup warm water
1 package dry yeast
1 pinch sugar
3 to 3 1/2 cups unbleached flour
5 tablespoons olive oil
2 teaspoons light salt
Stir together warm water and yeast, add sugar and let stand a few minutes. Add 3 cups of flour, 1 Tablespoon oil, and the salt. Stir, adding more flour if necessary. Knead on floured surface. Place in oiled bowl to rise. Cover with a damp cloth. Rise about 1 hr. Punch down and let rest while you prepare the toppings.
Heat the grill to medium heat. Cook the toppings you want for your pizza. I cooked sausage, ripe peppers and onion. Leave those on the stove top to stay warm.
I took half of the dough and pressed it onto a well oiled plate (Corelle dinner plate)
When the grill was hot enough, my husband sprayed the rack with Pam and then pushed and prodded the crust off the plate onto the grill. Close the grill lid, cook 3 minutes.
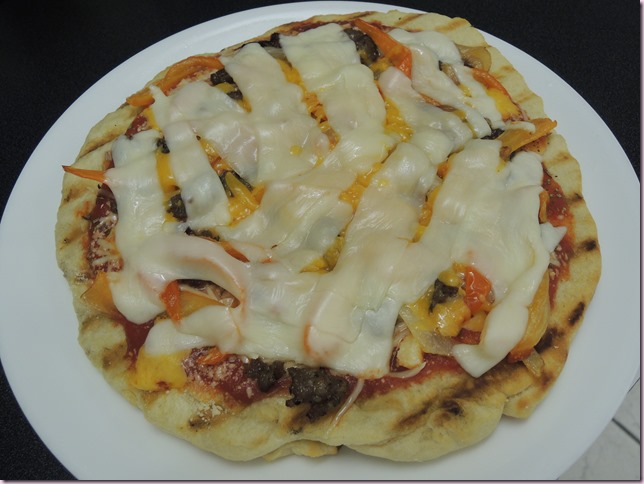
Bring it in and flip it over onto an oiled plate. You are loading your cooked toppings onto the browned side now. I put tomato sauce, oregano, garlic powder and Parmesan cheese on first. Then the meat and veggies. Top with grated cheddar cheese and strips of mozzarella cheese.
Now the doughy side of the crust is down and it slid right off the plate onto the grill. Cook for 5 minutes at medium heat. Check at 3 minutes to make sure it’s not on fire….I mean cooking too quickly. Hubby turned it 90 degrees to cook it evenly.
VOILA!!! Grilled pizza!
I made two but one was enough for our dinner so I froze the other one! It was the closest to a ‘wood fired’ pizza that I’ve ever had!
Delizioso
(Delicious in Italian! I bet you didn’t even KNOW I spoke Italian, did you? hahahaha!)
I’m joining Mosaic Monday HERE
Monday, February 5, 2018
Garlic Knots…OH MY!!!
I wanted to make some yeast bread but something a little different! So I did a google search and found
Garlic Knots from Simply Recipes!
And I have to tell you….
they are amazing!
Mouth watering delicious!
So here’s the recipe for Garlic Knots
If you are making your own dough:
- 3/4 cup warm water (105°F-115°F)
- 1 package (2 teaspoons) of active dry yeast (check the expiration date on the package)
- 1 3/4 cups bread flour (can use all-purpose but bread flour will give you a crisper crust)
- 1 Tbsp olive oil
- 1 teaspoon salt
- 1 teaspoon sugar
If you are using store-bought pizza dough:
- 14-ounces pizza dough
Garlic-Butter Coating:
- 5 Tbsp unsalted butter
- 4 cloves garlic, minced
- 1/4 cup parsley, minced
- 1 teaspoon salt
Method
If you are making your own dough, follow steps 1-3. If using store-bought pizza dough, let thaw to room temperature and proceed to step 4.
1 Proof the yeast: Sprinkle the yeast on top of the warm water and let it sit for 5 minutes. Stir to combine and let sit for another 5-10 minutes, until it begins to froth a bit.
2 Make the dough: In a large bowl, whisk together the flour, salt and sugar. Make a well in the center of the flour and pour in the olive oil, then the yeast-water mixture.
Mix this together to form a soft dough and knead for 5-10 minutes. (Can use a KitchenAid mixer with a dough hook for this step.)
3 Let the dough rise: Shape the dough into a ball and lightly coat with olive oil. Put it in a large bowl, top the bowl with plastic wrap and set it at room temperature to rise to double its size. This should take anywhere from 90 minutes to several hours.
4 Quarter the dough and flatten into rectangles: When the dough has doubled in size, cut it into fourths.
Set out a large baking sheet and line it with a silpat or parchment paper.
Working with one piece at a time, flatten into a rough rectangle about 5 inches long 1/2 inch thick.
5 Slice into strips and form knots: Using a sharp knife, slice the dough into strips of about 1 inch wide by 5 inches long.
Cut these strips in half.
Take one piece and work it into a snake, then tie it in a knot. The dough will be sticky along the cut edges, so dust these with flour before you tie the knot.
Set each knot down on the baking sheet and repeat with the remaining dough. Remember that the dough will rise, so leave some space between each knot.
6 Brush with olive oil and let sit to rise: Once all the knots are tied, paint them with a little olive oil.
Loosely cover them with plastic wrap and let them rise again until doubled in size, anywhere from 90 minutes to three hours or so. Toward the end of this rising period, preheat the oven to 400°.
7 Bake the knots: Uncover the knots and bake in the oven 12-15 minutes, or until nicely browned on top.
8 Make garlic butter parsley glaze: Meanwhile, melt the butter in a small pot and cook the garlic gently in it just long enough to take off that raw garlic edge, about 1-2 minutes over medium-low heat. Add the salt and parsley and stir to combine. Turn off the heat.
9 Brush cooked knots with garlic parsley butter mixture: When the knots are done, take out of the oven and let cool for 5 minutes. Paint with the garlic-butter-parsley mixture and serve. These are best warm, but are good at room temperature, too.
from Simply Recipes ~ https://www.simplyrecipes.com/recipes/garlic_knots/
and now to mention the couple of things I did different. I did NOT let them rise nearly as long as this recommends. And I just sprayed my pans with PAM!
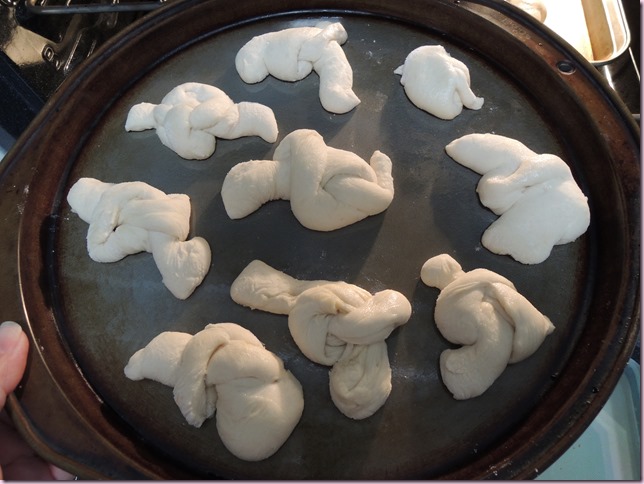
Rising for the first time was 30 minutes. And then I heated my oven for only about ONE MINUTE and put my knots in for the second rise, took them out, preheated my oven and then baked them.
I did not use as much parsley and after I dipped the baked rolls into the melted garlic butter, I rolled them in a mixture of Parmesan and Romano grated cheese.
We had some leftover grilled chicken (I need my protein)
(this is hubby’s plate….I didn’t have NEARLY quite that much!)
and I heated this wonderful Potato Soup for LUNCH!
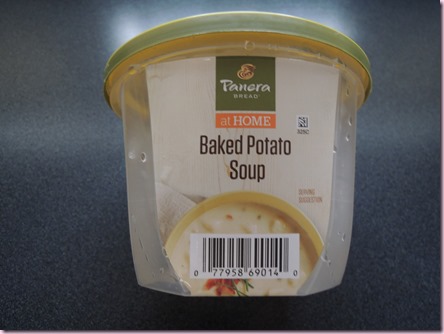
Now what’s for dinner?
Maybe I should have a salad! haha! Actually we’re having BBQ Brisket for dinner…but I won’t eat a lot…I promise! Did you make anything special for Super Bowl Sunday?
I’m joining Mosaic Monday HERE
Monday, June 5, 2017
Fried Okry!
Thursday, January 12, 2017
Chicken Pot Pie and Pinwheels!
It’s actually been cold enough lately to use the oven here in Florida!
So I made a Chicken Pot Pie! One of my favorite dishes (that I NEVER make! lol).
I had cooked a roast chicken in the oven a few days before, with potatoes, carrots, celery and onion. (I’ll give you that recipe another time) So I had good ingredients to put in the pie.
I made a white sauce, butter, flour a little salt and pepper and milk and added the chicken and chopped up veggies. I wanted even more veggies, so I cooked a few mixed vegetables in a bowl in the microwave for a couple of minutes and added them too.
I made a pie crust recipe and used 3 cups of flour to have enough for hubby to make pinwheels. I divided my dough in thirds. I’ve made a lot of pie crusts over the years and my secret for flaky crust is…don’t overwork your dough. Add just enough cold water to the flour and shortening mixture and don’t keep ‘beating’ it!
(put a ‘little’ butter on top)
Put bottom crust in large pie plate, warm veggies and chicken then cover with top crust. Cut slits in the top for steam to escape. And I put a piece of foil under the pie plate just in case.
Serve hot!
I froze some of mine for another cold day.
Roll out the other dough…
so that hubby can make pinwheels with lots of butter, cinnamon and sugar!
(notice that sugar canister is just a BLUR!)
He baked them at 375 for 20 minutes in the toaster oven.
He didn’t need to freeze any of his! haha!
We cooked together and had fun so…
I’m joining Thankful Thursdays today!
Sunday, September 14, 2014
‘Dessert’ No Sugar needed!
I don’t eat sugar. I can’t eat sugar.
It makes me feel bad (as in ILL!)
And I don’t eat artificial sweeteners like Splenda anymore either. I use Truvia which is a better alternative but I use it in moderation, too.
Anyway!!!
I was so hungry for something good that I made an old stand by, Peach Fried Pies.
You can use your favorite biscuit recipe. Don’t over work your dough or it will be tough.
I make buttermilk biscuits and made a half recipe of dough.
1 cup flour, 1/2 tsp baking powder, 1/2 tsp baking soda, dash of salt with about 1/3 cup of Crisco cut in. Then add enough buttermilk to get a soft dough. Divide into 5 balls. Roll out 4 of the balls in 4 circles to put your fruit mixture inside.
For the fruit mixture, I sliced a ripe peach into a glass bowl, added a little water and microwaved for about a minute. (use a fork to check for tenderness). Add a tablespoon of flour, one package of Truvia, shake shake shake the cinnamon and stir to thicken.
Spoon the fruit onto each circle of dough, fold over and pinch the edges together. Fry in Crisco at medium to medium high in a large skillet.
OH MY! They were GOOD!
And what did I do with the 5th ball of dough? I made strips of fried dough to sprinkle with cinnamon and sugar for hubby of course! I’m Southern and love my fried pies. He’s not…and not so much! haha!
(peach trees in South Carolina)
I’m joining Beautiful Sunday
Amaze me Monday and
Lavender Cottage for Mosaic Monday.
Do you like Fried Pies?
What fruit do you like best?
Saturday, December 28, 2013
“The Good Luck Girls of Shipwreck Lane”
This was a fun book to read and it’s a debut novel by Kelly Harms.
The characters ‘grow on you’! You wonder how you can relate to them at first but then you fall in love with them the more you read.
Ricki Jill featured a cook book with the recipe for Cherries Clafoutis and that’s one of the main dishes in this book.
Confidentially….this book will make you want to cook AND bake! (I’m using one of your photos Ricki Jill, hope that’s OK)
I also read another Lee Child book, Worth Dying For but it was intense and had a disturbing ending. I still love these books with Jack Reacher as the main character but I need to read a few other authors and mix it up a bit before I return to more of these.
I finally got my Goodreads updated for the year. I’ve read 37 books for 2013 and I’ll probably add at least one more before the new year!
Are you on Goodreads? Are you reading something good right now?
Join us for Literary Friday HERE !
Saturday, September 29, 2012
The Sisterhood of the Traveling Susan Apron
Do you know what it is?
Have you seen the Traveling Susan Apron?
(borrowed from Susan’s blog)
It started back in March 2012. A wonderful lady named Susan who blogs at My Mother's Apron Strings creates an apron each month and gives it away! The winner of the March apron was Meggie. She decided to keep the apron for a couple of weeks, write some of her experiences in a journal and then send the apron and journal on to a blogging friend. So far is has been to these sweet ladies in places around the world…
Meggie at Meggie On The Prarie in Texas
Elaine at Pear Tree Log in England
Scarlet at Tales From Beyond The Nook in England
Jane at The Maple Syrup Mob in Ontario, Canada
Deb at Just Cats in Ontario, Canada
Susan at Just Sayin' in Ontario, Canada
and Linda at A La Carte in Georgia.
I feel so honored to be chosen to join this Sisterhood and use this special apron. I plan to take good care of it…and pack it in my suitcase to go along with me on my journeys!
Yes…the Traveling Apron is getting ready to travel by car!
So I got busy baking magic cookies for the trip!
These are made using my mother in law’s recipe and they are the BEST!
Oh…the ones on this plate are all round?
Wasn’t there another plate with odd shapes?
HERE they are!
Thanks Linda for this wonderful honor and for all of the sweet gifts you sent along!
The apron is happy here in Florida with the palm trees!
I’ll check in again soon with updates!
Happy Weekend!
Saturday, June 23, 2012
Are you hungry AGAIN?
We love to eat! We love to buy fresh ingredients and get in the kitchen together and cook! And I am so glad my hubby loves to grill!
What’s on the menu tonight?
Beef Ribs....OH MY!
Hubby marinates them for at least an hour. He has even agreed to share his secret marinade recipe. Of course, he says he adds to it....so there may be a secret ingredient he’s guarding! heehee!
He does not put the BBQ sauce on the ribs while they are grilling. We ‘dip’ our ribs in sauce on our plates.
I’m joining Shannon at Cozy Home Scenes. Hope you’ll check out some of the other party goers for more great summertime meal ideas!
Which do you prefer....Beef ribs or Pork?
Beef ribs are my FAV!